First the propeller...
I've had the prop for a while now, but wanted to wait until it was finished before writing about it.
There are very few places that will make a custom propeller for a Curtiss OX-5. I say custom, because I wanted it made to its original specifications.
I have dealt with Sensenich Propellers on several occasions, and have always thought highly of this company. I contacted Don Rowell who runs the wood propeller division in Plant City, Florida. I told him my needs, and they were happy to build it for me.
The original prop on the L-P was made by Hartzell, and I have numerous photos of it. Based on that, I wanted it to be made from walnut with brass leading edge tipping and a spinner hub. Now, what's interesting about this connection with Sensenich, is that quite a number of years ago, they took over the wood propeller division from Hartzell.
 It took about a year to get the prop made, but they kept me up-to-date with photos along the way.
 One concession they asked to make was with an integral hub. Usually the spinner hub is made with a bulkhead on the front and rear of the hub and then wrapped with thin plywood. This works good, but many times you will see a separation between the plywood and the blade over time. With the integral hub, the blades and hub are all carved from the same stack of laminations which will be very strong and will never crack. They asked to do it this way for easier manufacturing on their end.
My initial thought was that the prop would be heavier, but with biplanes from this era typically tail heavy, this would not be a concern. I gave them the green light to go ahead.
 |
| Decal I made |
After it was delivered I had to do the detail and finish work. I wanted original looking Hartzell decals on it, but accurately reproduced ones are not available so I made them.
 |
| Original decal |
The artwork is actually pretty easy to make and only took me about 2 hours. I then print them on water-transfer decal paper. The same type used on plastic models. The paper comes in white or clear. The white paper prints out nice, bright colored decals. The clear (as I had to use here) does not. In fact they are somewhat translucent. This meant I had to put a white decal under the graphics only of the finished one. Although tedious, the results are beautiful and authentic looking.
Once the decals were applied, I dulled the brass tipping some to give it a little patina. Then clear-coated the whole prop with semi-gloss clear. Finally, I painted the hub the same red trim as the rest of the airplane.
The specs are: 102" with a 58.5 inch pitch. Let's hope it works!

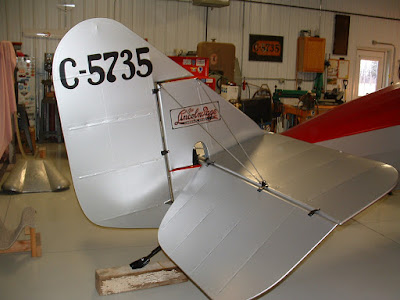
Then, I got the tail on the airplane.
Here are some other detail shots...
I painted the new wires I ordered from Bruntons an aluminum epoxy paint. I did it for originality only as stainless ones were not available and used for many years later. The terminal ends were all cadmium plated.
The pitch trim is a jacking mechanism that raises and lowers the leading edge of the horizontal stabilizer. Typical of many airplanes from this era.


