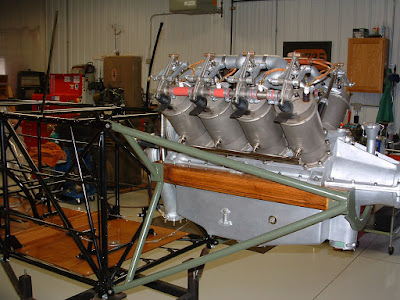
It wasn't without issues, though. I mentioned in the last post I was having problems with the engine mount. Well, I ended up having to make another one. I hate redoing things, but it just wasn't going to be right, no matter how much I tried. The fixture I used to build the mount was based on factory dimensions, but it just didn't match up well with this particular airframe. I really should have known better from the start. Who knows how much hand-building went into these airplanes - there could be lots of variations. So, I did what I should have done from the start - built it right on the airframe.
 |
| Fixture used to build new mount |
 |
| Final check of fit after welding |
Much better outcome! Unlike OJ Simpson - it fit like a glove. Here you can see the fit being checked with the old wood mounting beams. All 0.0 degrees with the electronic level - Nice!
 |
| After a coat of epoxy primer |
 |
| View of front mounting plate |
 |
| New oak wood engine mounting beams |
 |
| Getting ready to set the engine in place |
 |
| Finally installed! |
Andy had made new oak engine mounting beams some time back. I just had to re-sand them after sitting for so many years and apply a couple coats of epoxy varnish. They look great.
Then I was time to set the engine up on the beams. It will be on for the next couple of months as I make/run all the controls.
 |
| ELT installation |
 |
| ELT antenna |
I don't get too carried away with these. I go as cheap and minimal on the installation that I can get by with - just enough to meet the requirements of the TSO and FAA regulations.
I mounted the ELT in an access panel on the belly of the airframe near the tail. I then added a bracket to mount the antenna inverted inside the fuselage. I always put the antennas inside. Would not want to see that ugly thing on a 90 year old airplane!
So now, I'm working on new throttle linkages. The next post should cover the fabrication and installation of those. Check back soon!

No comments:
Post a Comment