This is a picture of the original logo that was painted on the vertical stabilizer. Quite remarkable to have this! At first, I was going to have an artist or sign-maker paint this on, but then I decided to give it a try myself.
Now, I'm no artist, but love trying new things and besides, I'm a tight-wad and didn't want to pay someone else to do it!
So here is how I tackled it....
I started out by making a template. With a sheet of mylar, I was able to trace out the lettering. The nice thing about doing it this way is that I could match the lettering exactly like the original. Using the template and a pencil, I traced the logo on the vertical stab.
Then it was just a matter of painting between the lines. I used dope which gave the right looking finish plus good adhesion. Good brushes are the key. Long, soft bristles that can hold lots of dope work best. 2 coats are necessary as the first coats melts in and brings up some silver. I then outlined it with a very narrow pin-striping brush.
I'm not sure I'll ever pursue a career as a sign-maker, but I was very happy with the results.
While I was in lettering mode, I finished up the registration number on the rudder. I used a similar process - made a template from the original fabric, traced it on the rudder, then brushed the dope on. You can refer to a couple posts back that explains the "C" designation.
I'm out of school for a couple of weeks, so I'm getting a lot of other things done. Here's a bunch of photos showing all the progress...
 |
| Painted and installed leaf springs for the tail skid |
 |
| This is the original tail skid shoe. It had been broken and welded, my friend, Mark offered to make a new one. |
 |
| If the shoe fits, wear it! Here it is installed - looks great. |
 |
| I then installed the radiator that was previously finished. |
 |
| And the header tank - the brass object in the top of the photo. |
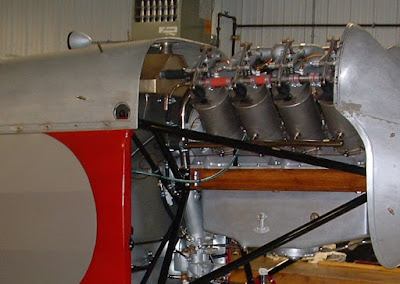
Besides covering the 2 lower wings, the last real time-consuming thing to finish is the cowling. With most of the firewall forward finished, it was time to start. Some of the pieces are original, some Andy had made when he bought the project in the '60's, and the rest I'll have to make from scratch.
The nose portion requires an inner support that I had to make. Once all "bolted up" it makes for a very strong assembly. You could stand on this cowling!
The original upper parts require nothing but some smoothing out on the English wheel and new hinges. I'm using brass piano hinges as that is what was originally installed.
As far as airplane cowlings go, I'm not sure there is anything better looking than a cowled-up OX-5 - great lines!
I'm currently working on the lower panel, then have to make new side ones from scratch. The next post will probably cover details on that. Have a safe and happy new year!


No comments:
Post a Comment