Friday, December 16, 2016
OX-5 Install and other Misc.
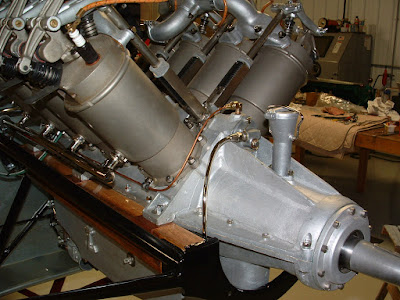
Made some good progress since the last post - the OX-5 is on for the final time. Since it had already been on prior to covering, the process was pretty uneventful.
The OX-5 manual calls for copper strips to be installed between the wood bearers and mounting lugs. I made them into small U-channels instead. I also used a feeler gauge to make sure the engine was sitting even on each pad.
Once all bolted down and safetied, I could start attaching all the water lines, controls, Zenith carburetor, etc.
The water and oil lines (like all other parts on the engine) are nickel plated. These are plated as a final assembly, i.e. nuts installed and flared. All the fittings used this early had a 45 degree flare instead of the 37 degree used today.
Also got the tires mounted. I think they look pretty cool and should have them on the airplane soon. Right now, it is convenient to have it sit lower as I work on the engine.
And....got the fuel gauge mounted too. An earlier post from a couple years back covers the restoration of it.
I'm also working on the logo that is painted on the vertical fin. I'll add a post on it when complete. In the meantime, I'll keep working on the firewall forward, working specifically on the header tank for the radiator and all the plumbing associated with that. Then, I'll get it sitting on the gear.
I also keep forgetting to mention, I sold my hangar in NC Illinois and purchased one in Brodhead, WI. Not moving, though, until next summer. I worked it out this way so I can hopefully have the LP all done except for final assembly. Will make the move much easier. Can't wait to be at Brodhead with all my friends and closer to the Kelch Museum. By the way, go to the Kelch Museum website. A new promotional video for our fundraising efforts has been posted.
I doubt I'll have another post before Christmas, so I hope everyone has a VERY MERRY CHRISTMAS!
Subscribe to:
Post Comments (Atom)


No comments:
Post a Comment