
Mark and I finished our magneto magnet charger (magnetizer) this week, and it is a thing of beauty! I need to point out, though, that Mark did most the work. He had the last couple of weeks off, did all the machining, and he and a neighbor made the beautiful oak cabinet. It looks like a vintage piece of equipment, and with both of us liking old things - it's perfect!
This was not our invention. In fact there are numerous specs on the Internet for devices like this. Even old Dyke's automotive manuals from the early 1900's have plans. We did have certain criteria: we wanted a magnet charger that would generate about 12,000 ampere-turns - enough to saturate the magnets on just about any magneto magnet.
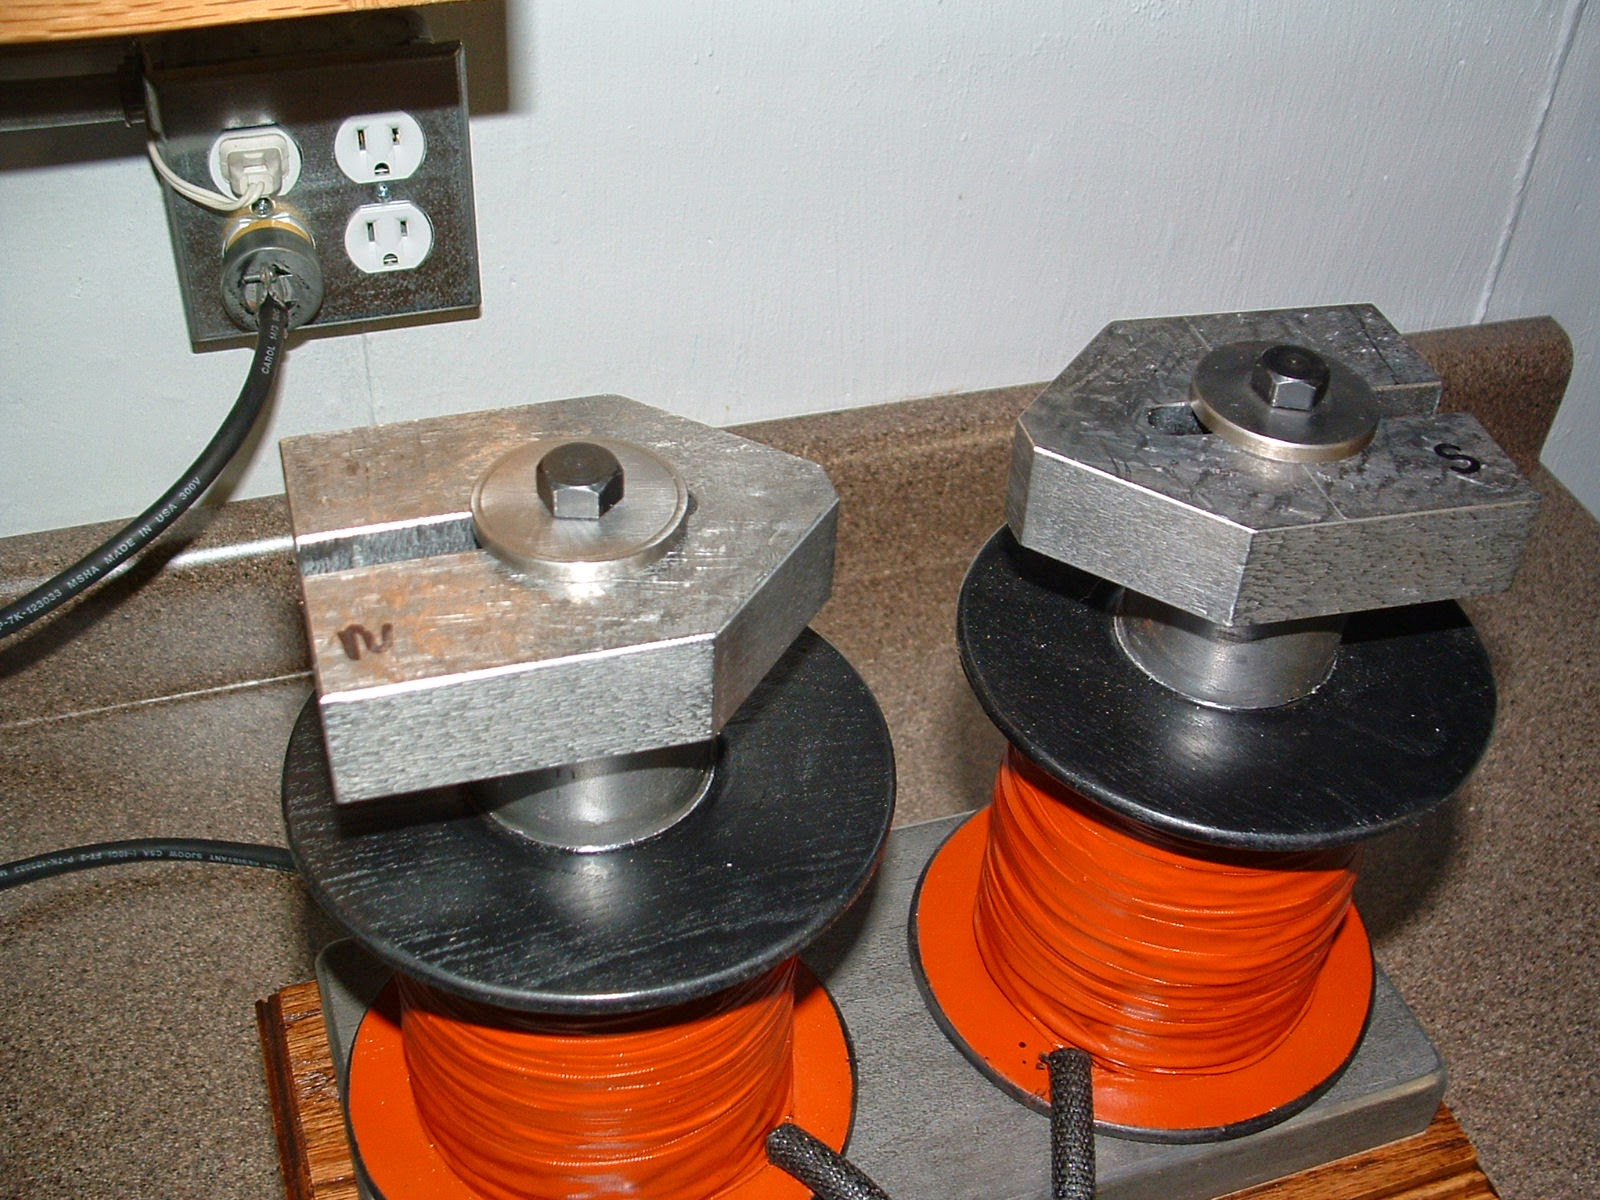
Our design has two 6 lb. coils of 18 ga. copper magnet wire wound on 2" steel cores. The coils are mounted on a steel base that allows the flux to flow un-inhibited between the two. Adjustable pole shoes at the top contact the magnets that are being re-magnetized.

Electrically, this unit runs on 115V AC (another reason we chose this design). DC current has to flow through the coils, so a full wave bridge rectifier is used. We installed a line fuse, added a light to know when the unit is energized, and an ammeter. When energized, it draws about 10 amps.

Here's a picture of one of the Berling magnets being charged. We couldn't have been more pleased with the results. The magnet initially had a pull force of 6 lbs. after charging, it had a pull force over 30 lbs.! We got the same results when charging both magnets simultaneously, indicating we are getting adequate saturation. The unit was only energized for 5-10 seconds.
An important thing to know, a keeper has to be used when the magnet is transferred from the charger to the magneto. A keeper is just a steel bar, about the same cross-sectional area of the magnet, placed across the poles. This allows for a highly-conductive path for the flux to flow. If it has to jump an air gap, even for just a second, the strength of the magnet is compromised. We tested this several times - a charged magnet would again pull about 6 lbs. after the keeper was removed.
A better way to re-charge the magnets, and not mess with a keeper (which can be a challenge on the Berling because of how the magnets mount) is to re-charge the magnets on the magneto. That way there is no transfer from the charger to the magneto and the keeper is not necessary. The pole shoes on our unit allow for this, and can be changed if I'm doing a different shaped magnet.
So with this done, I can finish up the Berling overhaul. I had it mostly complete, but came across a problem. When I assembled the armature, I noticed it had a slight wobble to it. I put it between centers in my lathe, and it had about .010" runout at the bearings! I suspect it may have been like that all along. My main disappointment, though, was this was an armature I had rewound. I've got several Berling spares, so I grabbed another armature, put it between centers, and it was perfect. The coil looked good and checked out fine, but I refuse to use an armature with 100-year old magnet wire on an engine that only has one magneto! I have lots of coil winding experience in my previous work as an engineer and am aware that the polyester and other insulating materials used on modern magnet wire is far superior to what was used originally. So, I sent it off for re-winding. When it comes back, I'll finish up the magneto and put in a post on the overhaul.
I'm also making great progress on the upper wings and will update everyone on those soon. I'm giving final exams Monday and Tuesday next week to our future A&P Mechanics and will then have a month off over Christmas break. Unless we get bitterly cold like last winter, I should be able to get a lot done!
Until next time...
Hello Mark,
ReplyDeleteCould you inform me with how much voltage (VDC) should be outputting from the Full Wave Bride Rectifier? Thanks!