Friday, February 27, 2015

OX-5 Data Tag & Data Tag Restoration

Different people have asked how I restore the various data tags and placards used on antique aircraft.  Since I had to do the OX-5 tag, it was a good opportunity to put the info in a post.

Most tags are embossed, or have raised lettering. The background is painted a color with the paint removed from the top surfaces of all the lettering.  Debossed, or engraved lettering can be done too - I'll address that later.


Here's the tag as removed from my engine.  Although worn away, the background is filled with black paint.


I start by polishing the borders, top of the lettering, and stamping pads.  This makes final clean-up easier and decreases the risk of rubbing through the paint.  

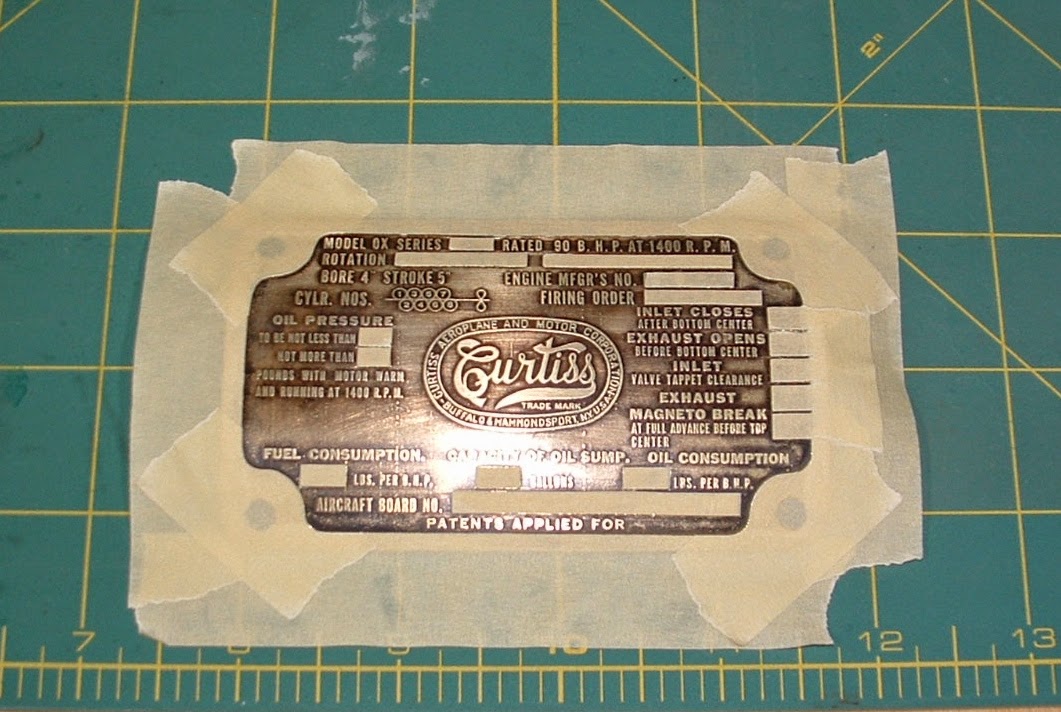
I then put masking tape around the border and the stamp pads.  This makes it easier to remove the paint, and keeps the paint out of the stampings which would be difficult to remove and maintains an original look.


Time for paint - a couple of light coats is best.  I sprayed this one with flat black, which tends to dry a little quicker.


Here it is with the masking tape removed and ready for the lettering to be cleaned up.

 Over the years, I've tried lots of different ways to clean up the lettering.  What I've found that works best for me is to use a new, sharp razor blade.

Run the blade at about a 45 degree angle over the top the lettering, slowly scraping away the paint.  The angle is important so the blade does not drop in between the letters and remove paint where you don't want it removed.  Go slow, and you'll see the shiny brass on the top of the lettering magically appear.


Once all the required paint is removed, I use some mild rubbing compound to re-polish the surfaces and this also removes any paint I may have missed.

I then clear coat the whole tag to seal both the paint and polished metal surfaces.  The whole process taking less than an hour.

Voila - a beautiful tag!


Here is the airframe tag and fuel gauge dial that I had previously performed the same process on.


If the tag is debossed, I like to fill the sunken lettering with an acrylic, water-based paint.  Once filled and slightly dried, you can take a damp rag and remove any unwanted paint from the upper surfaces, clear-coat if wanted, and you'll have a great looking tag, control knob or whatever.


The tachometer dial that I restored had debossed lettering. That is the process I used on it.


Stay tuned for another post soon on the leading edge - just about finished.


Friday, February 20, 2015

Upper Wings #8 - Trailing Edge

Got the trailing edge installed this past week - unless the airplane is in a tail slide, then I guess you could say it's the leading edge???  Being the high-performance, aerobatic machine the LP is, tail slides and other maneuvers will be a common occurrence...NOT!

The Lincoln Page originally used typical aluminum trailing edge, which makes it easy to make/install.  I like to add one other component, though - a wood reinforcing strip inside to strengthen the aluminum V-channel.  It keeps the trailing edge from moving or scalloping as the fabric is shrunk - either initially or due to heat from the sun.  Here are the steps:

I start by gluing on a triangular strip of spruce 

I then hand plane it to match the contour of the ribs

This allows the aluminum V-channel to butt up tight against the strip
and prevent it from flexing or scalloping as the fabric is shrunk

Finished installation.  The notched out area is above the cockpit
and helps in getting in and out of the airplane

Leading edge next - unless the airplane is in a tail slide.....never mind!   

Sunday, February 15, 2015

February 15 - Misc. Update

All the capstrips are installed...a tedious task that I'm glad is finally done.  Working on the trailing and leading edge now.  Not much to show in photos, but got a couple of interesting documents over the weekend that are informative and fun:

My friend Kent McMakin gave me this one

This must be where I got my love of old airplanes.  They probably owe me millions in profit sharing, or something like that!!!  Also included is a price list.  Can you imagine paying $10.50 for a cylinder assembly, $12.00 for a camshaft, or $21.00 for a crankshaft!  Maybe people in the 1920's complained about the prices like we do today, but at least they had a source for parts - Oh for the good old days...


Buck Hilbert sent me this one.  I had a B&W copy, so I was very happy to get a color version.  It's an original Lincoln-page sales brochure.  It will be great documentation to justify the paint and color scheme as my airplane was painted exactly like this.  The original owner, Chuck Balling, re-painted the aircraft orange and black when he purchased it - no one knows why.  After removing the layers of paint, I was able to find the original silver/red.  Also included was a spec sheet.


My next update should have more about the leading and trailing edge installation, so check back in a week or so.