First the cowling...
 |
| Round-head rivets and rivet sets |
 |
| Upper hinge detail |
Here is the upper hinge with the proper rivets. These look correct - the way an antique airplane should look!
The L-P also used brass hinges. Fortunately they are readily available.
 |
| Upper hinge |
 |
| Upper hinge attached to upper cowling |
 |
| Upper cowling |
This is the upper cowling with the new hinge riveted on. This is all original sheet metal. It still needs a little smoothing out on the English wheel, but is in remarkable condition.
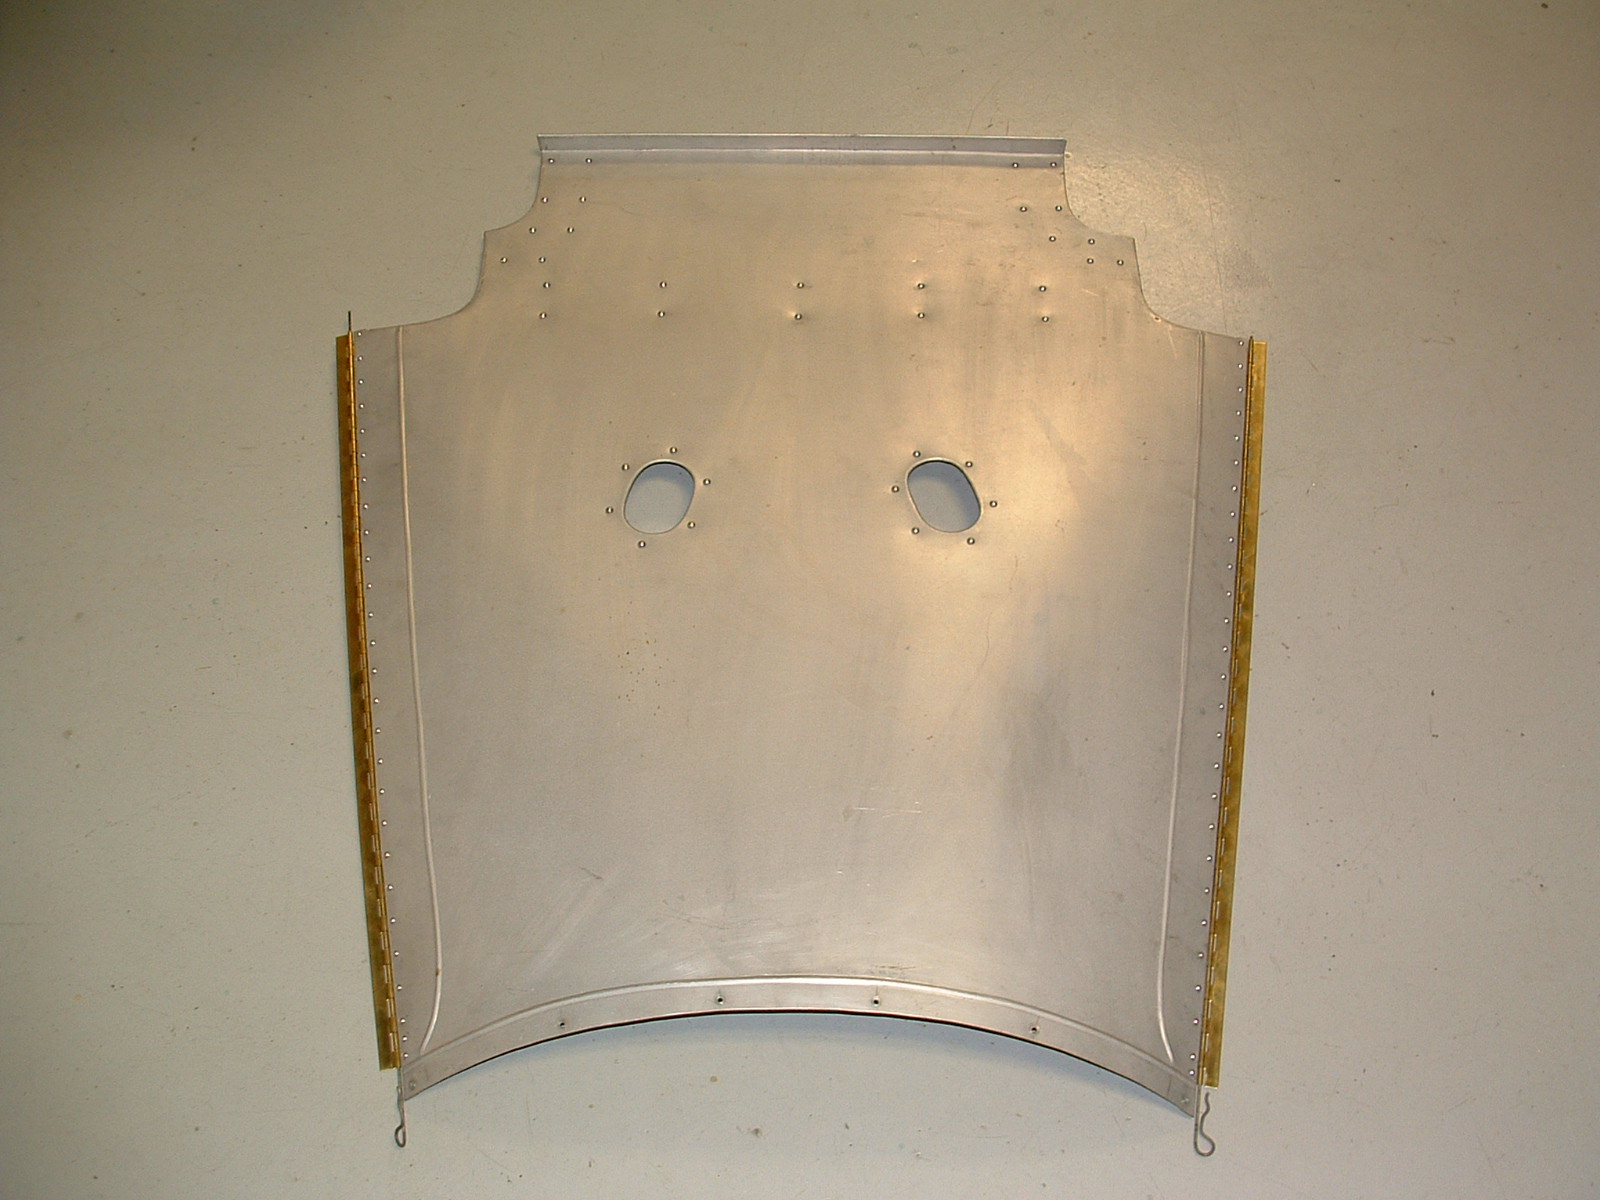 |
| Lower cowling |
Then I finished up the lower cowling, again with brass hinges installed and riveted with the round-head rivets.

Here it is cleco'd on to check fit for the umpteenth time. Cowling is just very time-consuming: put it on, check fit, take it off, tweak it, put it back on, over and over again!
 |
| Lower cowling support |
Besides the cowling itself, I had to fabricate the rear supports. Makes for a very rigid mounting when everything is bolted up.
 |
| Original side cowling |
The only thing left on the cowling to fabricate are the side panels. Here is one of the original's. Unfortunately, they have too much corrosion to use.
A lot goes into making these: beading, louvers, opening for door and the door itself.
 |
| Rear attachment for side cowling |
 |
| Template for side cowling |
I started out by making the rear mount. This will have studs mounted to it that will go thru the cowling and held in place with hair-pin type clips.
I then made cardboard templates instead of just using the originals as a pattern. That way I know I'll have a good fit.
You can also see the exhaust temporarily installed for the first time. I had to put them on to make sure the cowling fit properly. They will ultimately be finished in flat black.

Haven't started cutting any metal yet for these. Wanted to get a good start on the lower wings. I want to make sure all the covering is done prior to my hangar move in June.
 |
| Lower, left wing |
 |
| Rib lacing |
Here is the lower left wing. A little more rib lacing to do, then it's ready for all the surface tapes. This being the lower left, it will get the registration number painted on the lower surface like what was done on the upper right wing.
My next post will probably have more covering, and if I get a start on the side panels of the cowling, I do a detailed post on those and show how to do louvers, beading, etc. Check back soon!