Saturday, March 26, 2016

Start of Fuselage Assembly

Now it seems like some real progress is being made as I'm starting to install parts for the final time.  The floor, rudder and aileron controls basically have to be installed at the same time.  These pictures pretty much tell the story...

Floor with rudder and aileron controls installed

Front stick - grips are from a 1920's Harley Davidson
F-head which are a match to the originals
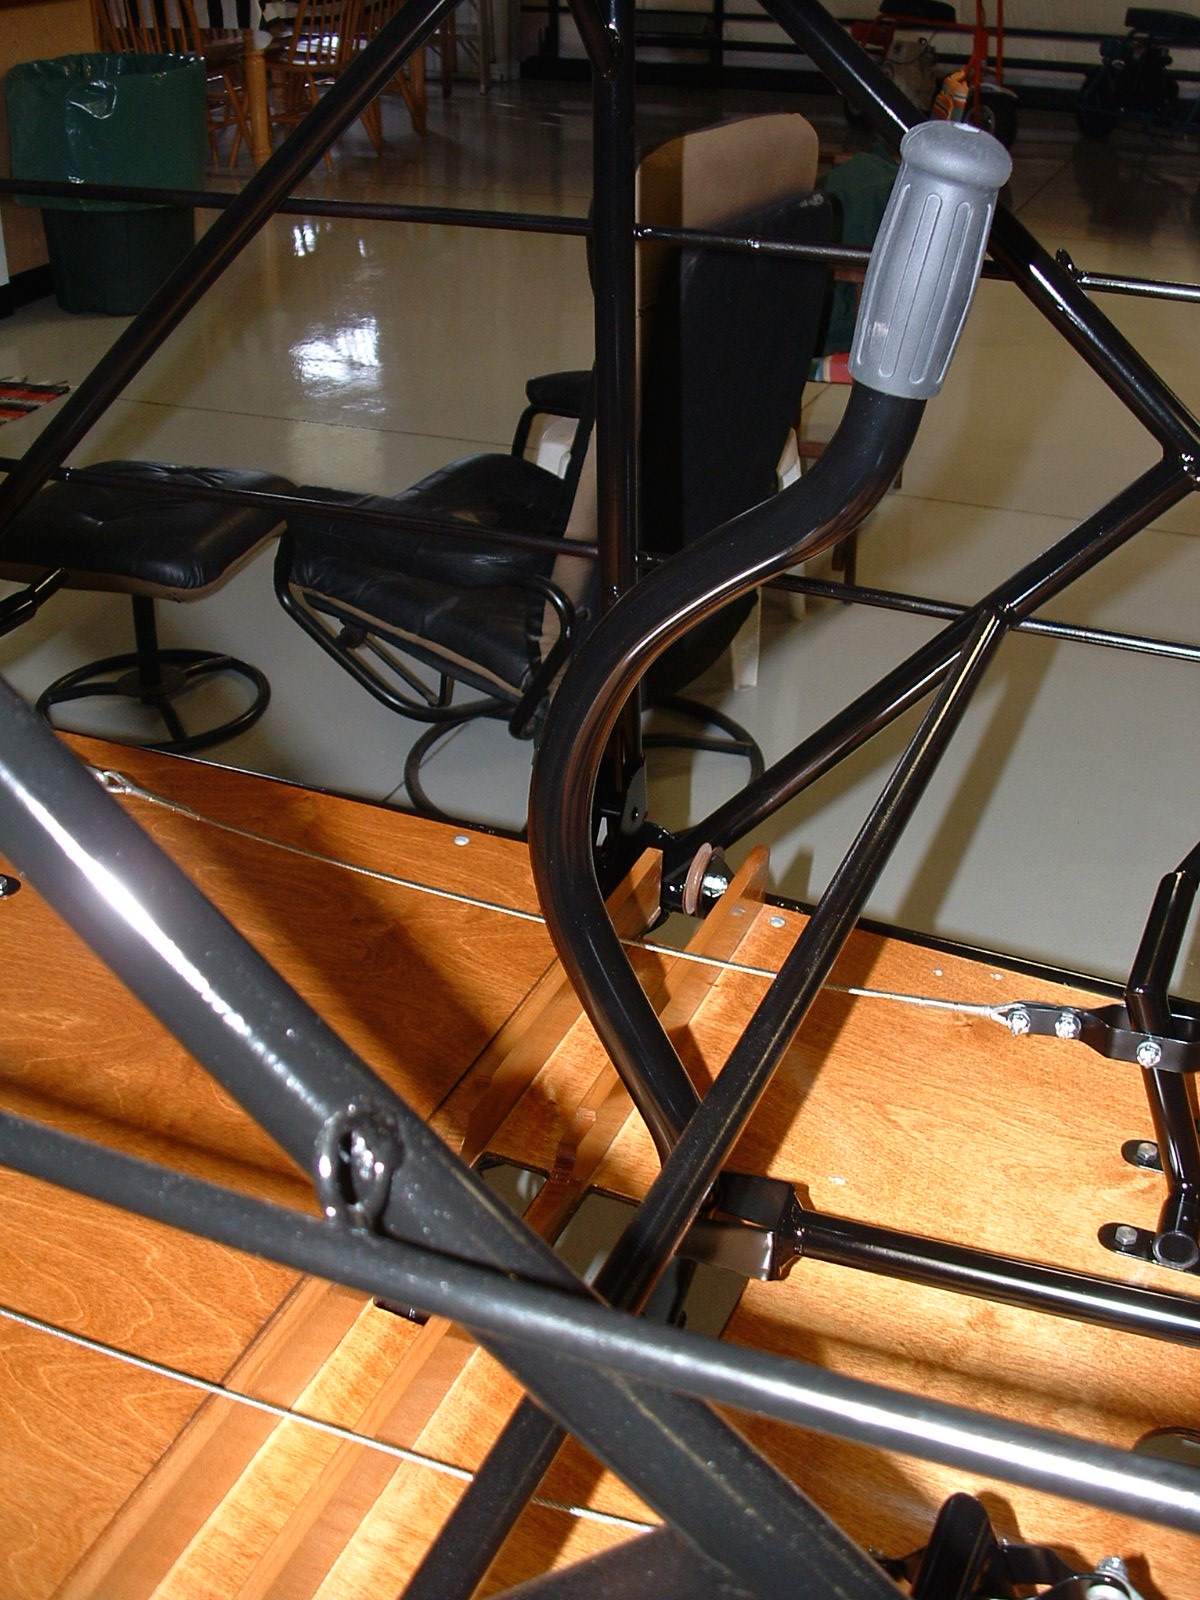
 
Rear stick
Another shot of rear stick 
Rudder pedal with previously made cables installed

There is a cover that mounts to the floor above the torque tube between the front and rear sticks.  The original, as seen in this picture, was too corroded to use so a new one had to be made.  

Here's how it's done:  

1.  Start with a piece of aluminum the correct size and just hand roll a curve that matches the original.


 2.  I then used my bead roller with flat hem dies to form the flange.

3.  Drill the holes, check fit and voila - about a 20 minute project.


So next, I want to hang the engine to make and run engine controls, radiator, etc.  Having some issues, though,  with the fit of the engine mount that I'm working out.  The next post should show the engine temporarily installed.  

In the meantime, hope everyone has a great Easter holiday with family and friends!


Friday, March 18, 2016

Engine Mount

One of the last major items to fabricate - the engine mount - is done!

Original mount


The original mount was damaged in the accident.


Engine mount fixture


Fortunately, when my friend Andy bought this project from the original owner in the mid '60's, he built a fixture to make a new mount.  Andy's intent was to quickly restore the aircraft and get it flying again, but obviously never happened.  Having this fixture saved me a lot of time,and guaranteed a good fit.


Repaired front plate


The only real tricky part of the mount is the front plate.  It would have been a little difficult to make:  .100" thick with 90 degree bends on a curve.  The original was slightly damaged, but after removing it I was able to make all the necessary repairs.
Flattened, doubled and bent tubes

Aligning front plate in fixture


The tubes that mount to the fuselage have a doubler that is inserted inside and held in with rosette welds.  The ends are then flattened and bent to the proper angle.

All the tubing is 1.125" diameter with .065" wall thickness.


After finishing the front plate, I welded in new U-channels and properly positioned it in the fixture, leveling the wood beams.  These U-channels hold and support the 2" X 3" wood beams that are what the OX-5 attaches to.


Tacking tubes in place


After that, other tubes could be cut to length and tack welded in place.
Mount removed from fixture and finish welded


After all the tubes were tack-welded, the mount was removed and finish welded.  TIG welding is my preference for items like this.


Finally, it was given a coat of epoxy primer.  Eventually it will be black, but will wait for test fitting and fit-up of the radiator, etc.

So next, I'm doing a little painting and starting to put pieces in the fuselage.  It's going to start looking like an airplane soon!


Thursday, March 10, 2016

Fuselage Paint

It's been nice to get back on some airframe work again.  It was time to remove everything from the fuselage that I had installed for fit-up, and prep for paint.


Rear seat belt mount


One last thing to install, though, permanent seat belt mounts.

The original ones were installed with hardened steel wires and ferrules, just like the drag/anti-drag wires in the wings.  I wanted something a little more permanent, so I welded in tabs made from .100" 4130.


Front seat belt mount


The fuselage could then be rolled 
into the paint booth for final color!  I had primed the tubing with red DP epoxy primer last year.  It just required a good scuffing up and wipe-down.  For paint, I've had good luck in the past with polyurethane, but I like to add a little flattening agent to lower the gloss.  I'm just not a big fan of glossy paint on 90 year-old airplanes.  A lot of people like to powder coat, but I think it's overkill on an airplane that will never see any inclement weather, and this method is way cheaper.


 This is a pretty exciting step.  From now on, everything installed stays there forever (or until it's restored again 90 years from now!)


With that done, I'm moving on to the engine mount.  It was bent up in the accident.  The only part I'm re-using is the front plate - a heavy, complicated shape that is salvageable.  This is the last major part to fabricate - hooray!

Original engine mount
The next post will probably be on the mount.  I've been off school all week for spring break and have a good chunk of it done.  Also, the birds are singing, temps in the 60's, time to do a little flying too!