Sunday, August 21, 2016

More Covering and the Kelch Stearman Flies


Many of you that follow this blog also know of my involvement with the Kelch Aviation Museum in Brodhead, WI.  The 1928 Stearman C3B shown above was restored in 1997 by Kent McMakin for Al Kelch.  Tom Hegy flew it for about 1/2 hour, then Al decided it was too valuable to fly, so it was parked - for the next 19 years!  Those years took a toll on it, and I spent about a month getting it annualed and airworthy.  This past Monday, I got the privilege of flying it once again!  How does it fly??  Like a truck!  Very heavy on the controls and not pleasant by todays standards, but it is so cool!  The Wright J5 is the best part and deserves no other engine powering it.  I'll be flying it around at the MAAC fly-in at Brodhead in September.  

Here's a link to a video:

https://vimeo.com/179248455

Besides all that fun, I got some more covering done on the LP.  

Practicing the modified seine knot

Runner along reinforcing tape
 It had been too humid to spray any dope, so I finished all the tail surfaces.  I don't know about you, but I always have to practice tying the modified seine knot as it is usually several years between that stage on projects.  I prefer to tie it with the runner on the outside, with round lacing cord.  If you carefully position the runner along the reinforcing tape, it is practically invisible.  Many people look at my covering jobs and don't even notice it.
Lacing on horizontal stabilizer


Horizontal stabilizer

Elevator


Once laced, all the surface tapes need to be applied.  Here they all are with the brushed coats and spray coats of nitrate dope applied.
Vertical fin

Rudder


Finally, we got a nice break in the weather this weekend and I was able to start spraying silver on the fuselage.

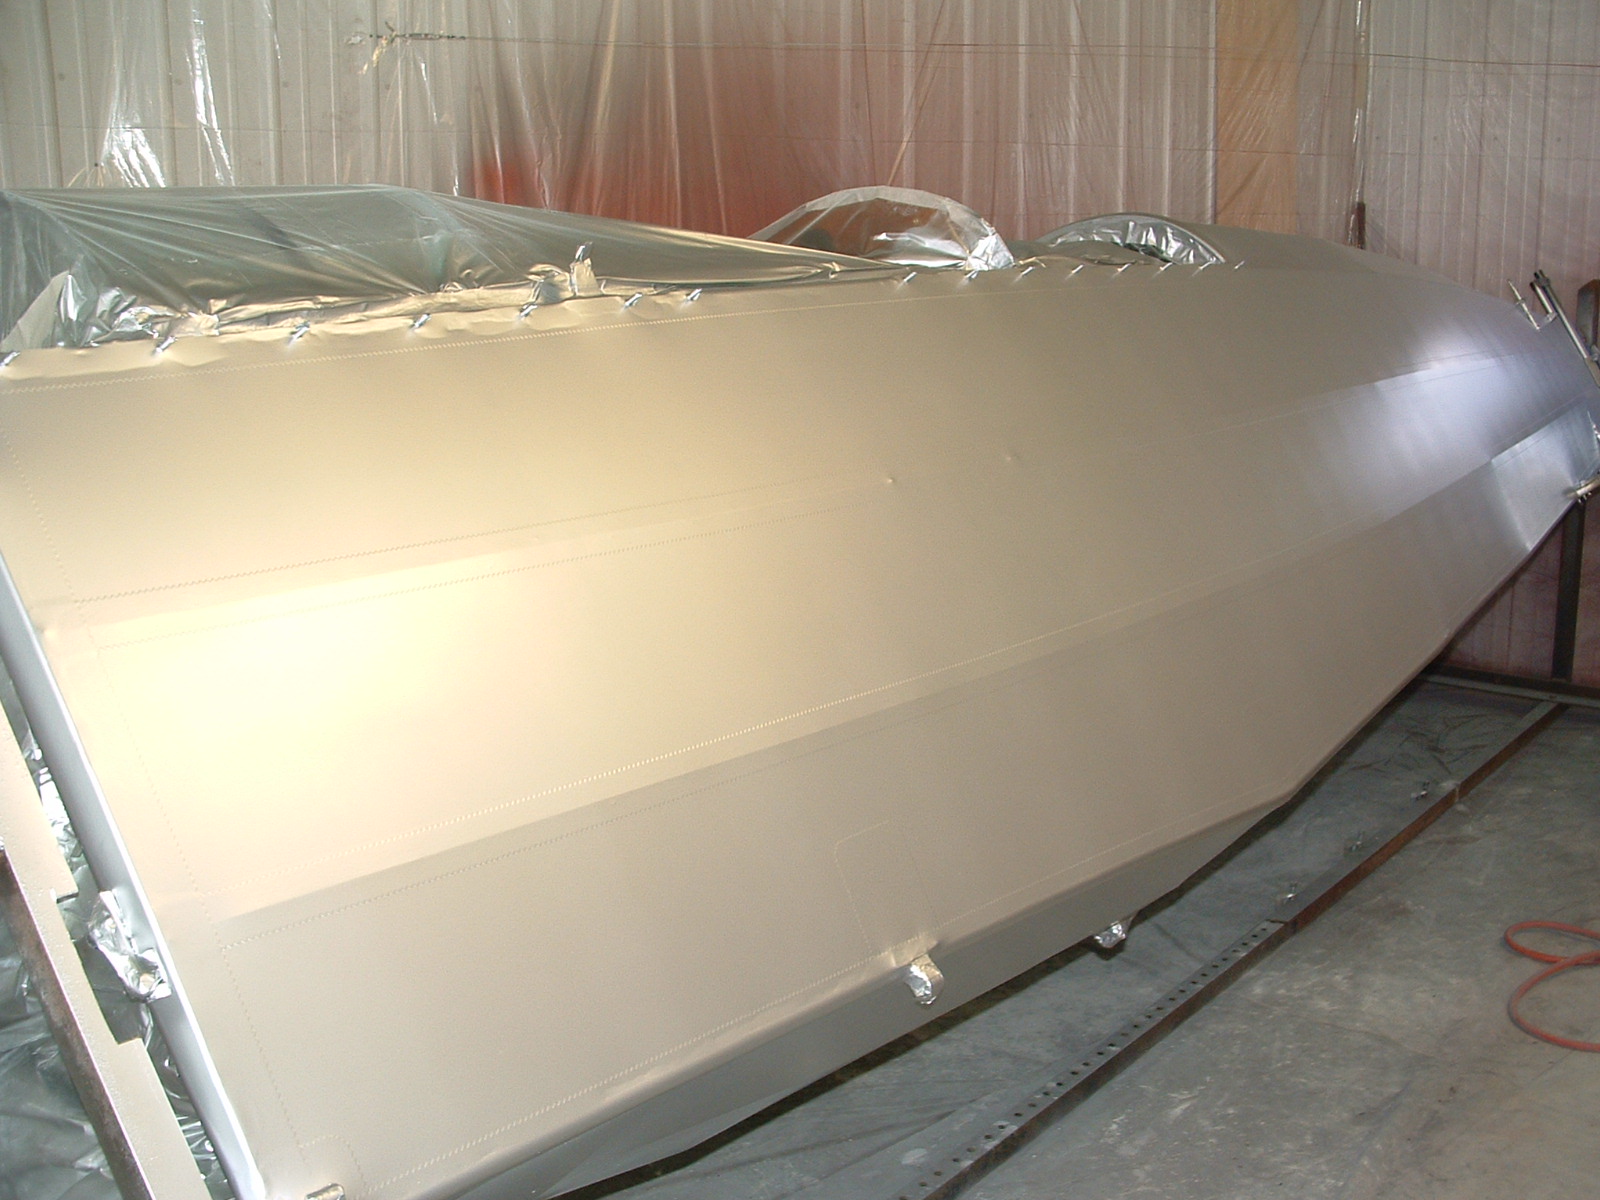
Here are the first 2 cross-coats applied.  The Ceconite process requires a minimum of 4 cross-coats, sanded after each 2 cross-coats.  I usually do 6 total, just to make sure the pinked edges are down nice and no other imperfections are showing.  Then 2 cross-coats of color, wet sanded with 1500 grit and one more cross-coat.  This results in a very nice finish that is not overly done.


So in the next couple of weeks will be more sanding, spraying, sanding, etc!  Hopefully the weather will continue to cooperate.  Check back soon!


Saturday, August 6, 2016

Fuselage Covered and More...

Well, if you went to Oshkosh, you know we had a variety of weather.  EAA 2016 was hot and humid, then cold and rainy.  In spite of the weather, it was nice to catch up with friends that we only see at EAA.  I enjoyed the WWI aircraft on display, especially those that were rotary powered.  I even got the privilege of hand-propping the 130HP Clerget 9B that Tom Kozura of Koz Aero brought on a stand.  Here's a video Cindy took...


Once back home, I hit the covering hard.  Got the fuselage finished and the covering on the vertical fin and rudder.  Here are some pics of that:


Here's the covering on without any dope applied yet.


Nitrate dope was then applied along with the surface tapes.  Once the tapes were on, I spent a lot of time with the iron getting the pinked edges down nice.  I'm not a big fan of burying the tapes in dope or making the fabric look like it was dipped in plastic.  I like the finish to look original and show off the careful and accurate workmanship.


I also like to limit overspray, so the firewall, cockpit openings and other misc. openings were masked off.


Fortunately, when all that was done, we got a nice break in the weather with lower temps and humidity.  I rolled the fuselage into the paint booth and got the 2 cross-coats of nitrate, and 3 cross-coats of clear butyrate sprayed on.


In between dope applications, I started on the tail surfaces - getting the vertical fin and rudder covered.  Here they are minus tapes.  They will require some rib lacing first.


So, as the weather permits, I'll keep spraying dope on the fuselage and continue on the tail surfaces.  It can be tough to spray dope here in the summer.  Quite often it is just too humid.    Spraying in too humid conditions causes the dope to blush, which is water vapor condensing on the surface of the fabric as the solvents evaporate off.  This can affect adhesion of the fabric and is not recommended to spray in these conditions.  Even with retarder (which slows the evaporation and drying time) I seldom spray above 65% RH.  Regardless, there is always work to do!  

More covering to report on the next post.