Thursday, December 29, 2016

Lincoln-Page Logo and Other Misc. Assembly


 This is a picture of the original logo that was painted on the vertical stabilizer.  Quite remarkable to have this!  At first, I was going to have an artist or sign-maker paint this on, but then I decided to give it a try myself.

Now, I'm no artist, but love trying new things and besides, I'm a tight-wad and didn't want to pay someone else to do it!


So here is how I tackled it....

I started out by making a template.  With a sheet of mylar, I was able to trace out the lettering.  The nice thing about doing it this way is that I could match the lettering exactly like the original.  Using the template and a pencil, I traced the logo on the vertical stab.
Then it was just a matter of painting between the lines.  I used dope which gave the right looking finish plus good adhesion.  Good brushes are the key.  Long, soft bristles that can hold lots of dope work best.  2 coats are necessary as the first coats melts in and brings up some silver.  I then outlined it with a very narrow pin-striping brush.

I'm not sure I'll ever pursue a career as a sign-maker, but I was very happy with the results.


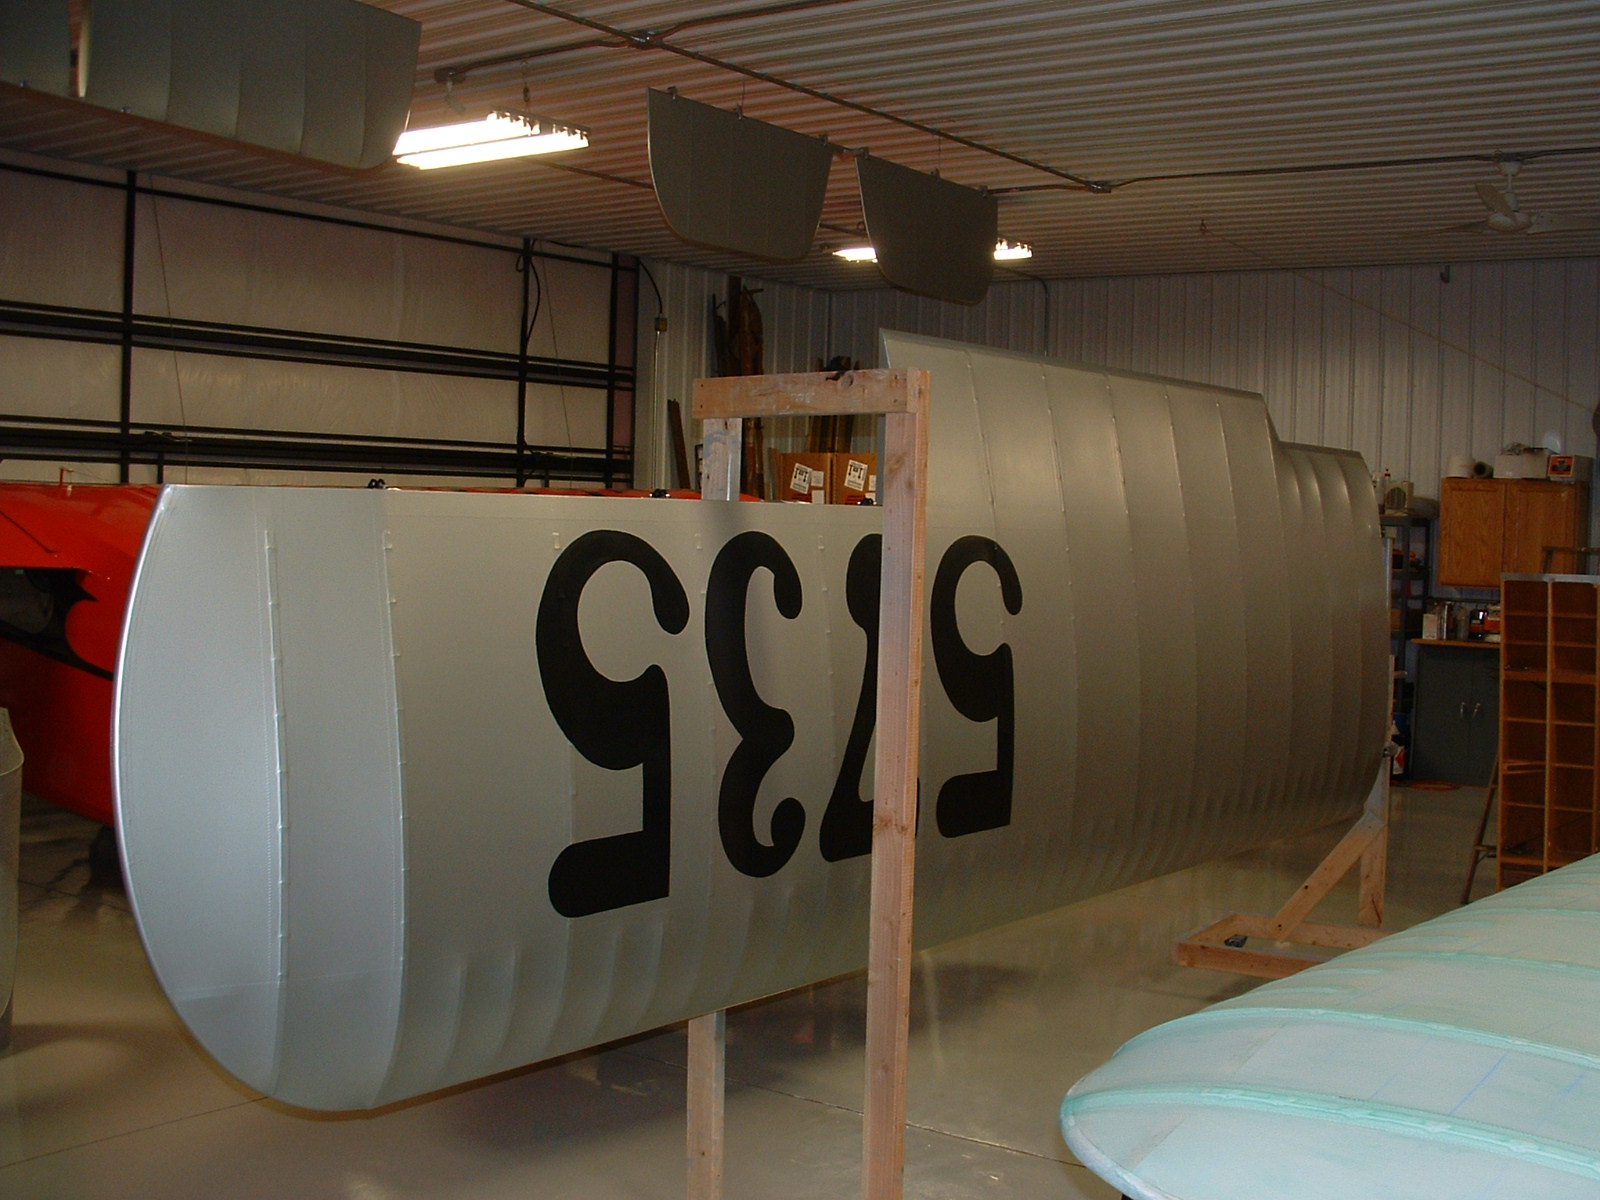
While I was in lettering mode, I finished up the registration number on the rudder.  I used a similar process - made a template from the original fabric, traced it on the rudder, then brushed the dope on.  You can refer to a couple posts back that explains the "C" designation.


I'm out of school for a couple of weeks, so I'm getting a lot of other things done.  Here's a bunch of photos showing all the progress...


Painted and installed leaf springs for the tail skid
This is the original tail skid shoe.  It had been broken and welded,
my friend, Mark offered to make a new one.
If the shoe fits, wear it!  Here it is installed - looks great.
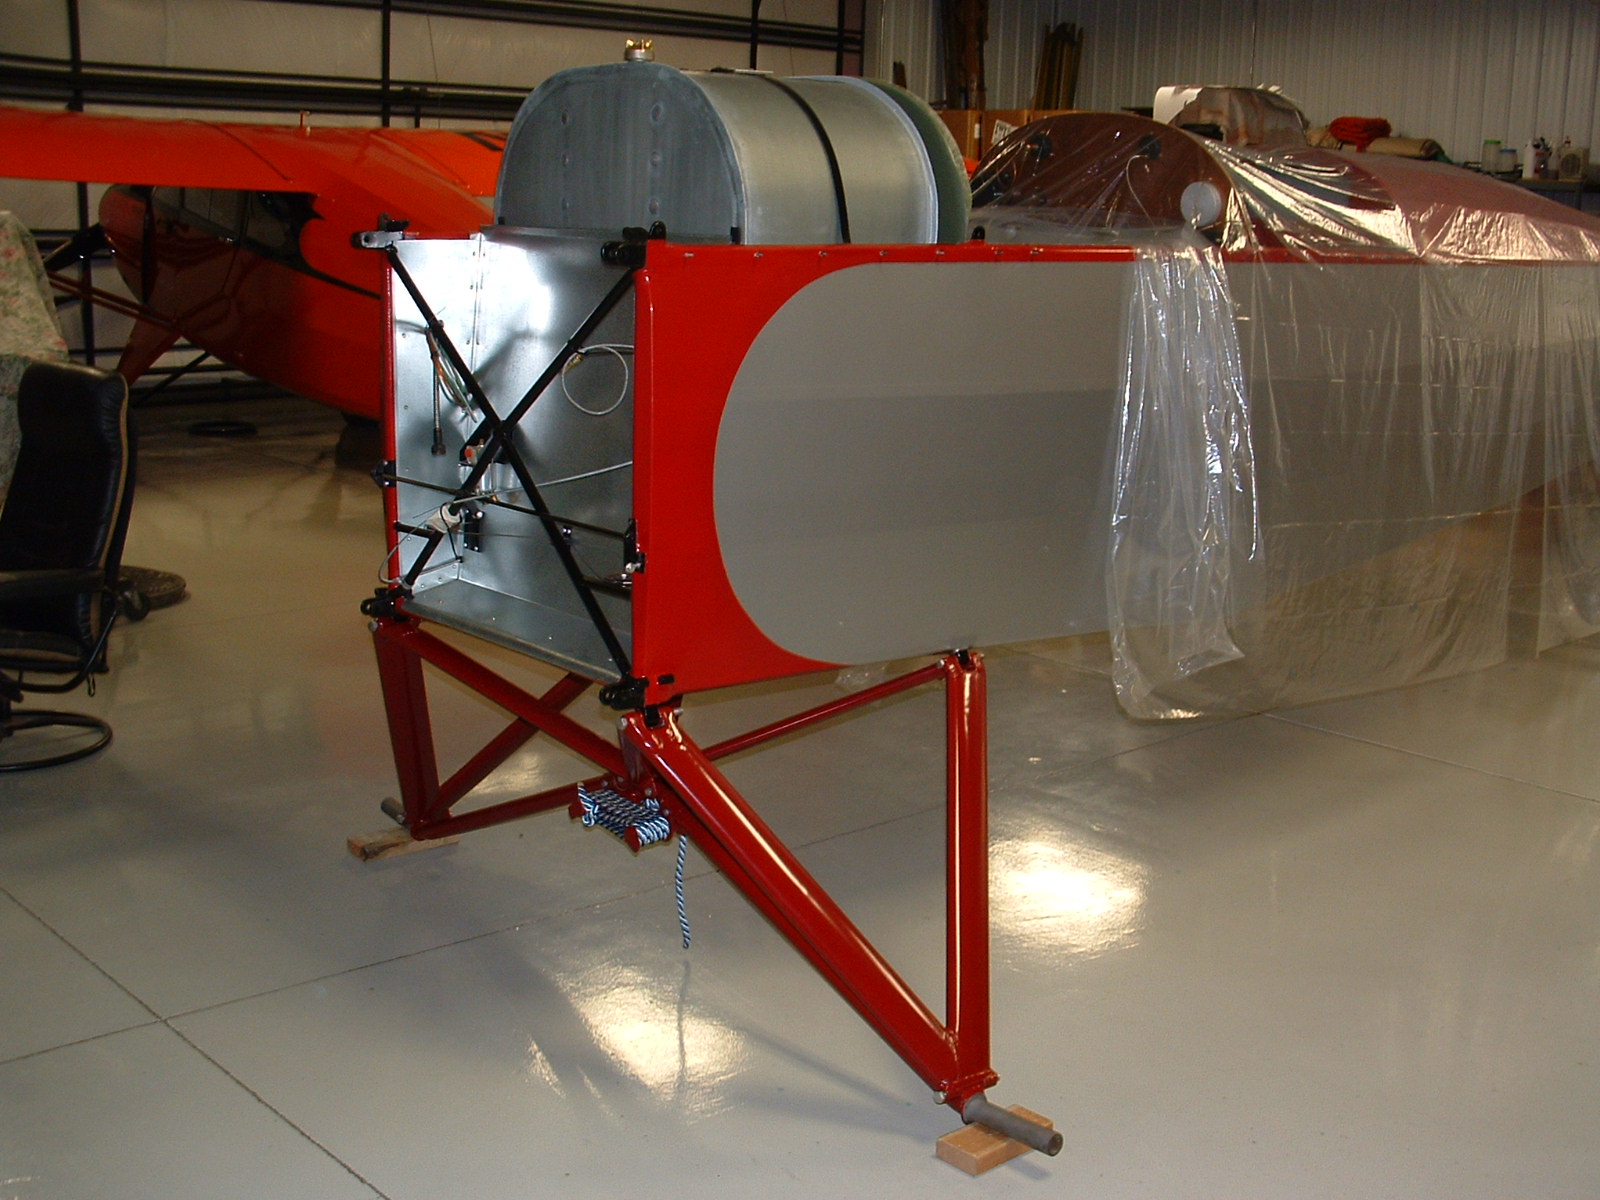
I then installed the radiator that was previously finished.
And the header tank - the brass object in the top of the photo.


Besides covering the 2 lower wings, the last real time-consuming thing to finish is the cowling.  With most of the firewall forward finished, it was time to start.  Some of the pieces are original, some Andy had made when he bought the project in the '60's, and the rest I'll have to make from scratch.


The nose portion requires an inner support that I had to make. Once all "bolted up" it makes for a very strong assembly.  You could stand on this cowling!


The original upper parts require nothing but some smoothing out on the English wheel and new hinges.  I'm using brass piano hinges as that is what was originally installed.


As far as airplane cowlings go, I'm not sure there is anything better looking than a cowled-up OX-5 - great lines!

I'm currently working on the lower panel, then have to make new side ones from scratch.  The next post will probably cover details on that.  Have a safe and happy new year!


Friday, December 16, 2016

OX-5 Install and other Misc.


Made some good progress since the last post - the OX-5 is on for the final time.  Since it had already been on prior to covering, the process was pretty uneventful.


The OX-5 manual calls for copper strips to be installed between the wood bearers and mounting lugs.  I made them into small U-channels instead.  I also used a feeler gauge to make sure the engine was sitting even on each pad.


Once all bolted down and safetied, I could start attaching all the water lines, controls, Zenith carburetor, etc.

The water and oil lines (like all other parts on the engine) are nickel plated.  These are plated as a final assembly, i.e. nuts installed and flared.  All the fittings used this early had a 45 degree flare instead of the 37 degree used today.


Also got the tires mounted.  I think they look pretty cool and should have them on the airplane soon.  Right now, it is convenient to have it sit lower as I work on the engine.


And....got the fuel gauge mounted too.  An earlier post from a couple years back covers the restoration of it.


I'm also working on the logo that is painted on the vertical fin.  I'll add a post on it when complete.  In the meantime, I'll keep working on the firewall forward, working specifically on the header tank for the radiator and all the plumbing associated with that.  Then, I'll get it sitting on the gear.

 I also keep forgetting to mention, I sold my hangar in NC Illinois and purchased one in Brodhead, WI.  Not moving, though, until next summer.  I worked it out this way so I can hopefully have the LP all done except for final assembly.  Will make the move much easier.  Can't wait to be at Brodhead with all my friends and closer to the Kelch Museum.  By the way, go to the Kelch Museum website.  A new promotional video for our fundraising efforts has been posted.  

I doubt I'll have another post before Christmas, so I hope everyone has a VERY MERRY CHRISTMAS!


Monday, December 5, 2016

Wheels

 The wheels finally got done, and I was able to pick them up on Sunday.  

I had Frank Pavliga from Ohio make these. He does a great job and has all the parts and suppliers set up to make these with drop center rims instead of the original clincher style.  Other than that, they are nearly identical to the ones originally on the airplane.  As you can obviously see, I had them powder-coated in black.

They're a 20" rim that use 30X5 tires.  I've had the tires for several years and just need to get them mounted. 

Also, no brakes.  I opted quite awhile back to go this route, so it will use the original tail skid as well.

 The wheels will also have streamlines like shown in this picture.  I borrowed these from the Kelch Museum as a pattern to make new ones.  I'll English wheel these out of aluminum and then put a bead roll and flange at the outer edge.  I'll include a post on those at a later date.


The wheels are mostly ready to be mounted.  My friend Mark helped do a lot of tedious tweaking of the axles to get the camber and toe-in/toe-out correct.  The legs were bent more than I originally thought.  Being all heavy-walled tubing, the only fix was to use heat and some very long bars to bend them back to where they needed to be.  Took a lot of trial and error, but we finally got it.

I need to leave the wheels off, though, until I get the engine mounted.  The airplane just sits too high with them on for my engine crane.  But, putting the engine on is next on the agenda!


I continue to make good progress on the covering.  The upper left wing and aileron are now done.  That means both uppers are complete.  I'm going to start on the lowers after the first of the year.  I would like to have the engine and wheels on as well as a good start on the cowling and sheet metal around the cockpits finished.


So that is what's next.  Stay tuned for an update on the engine installation and other misc. things in a couple weeks.


Friday, November 18, 2016

Gear and Engine Mount Install

I've got the upper left wing in the booth getting all the misc. coats of nitrate and butyrate dope applied.  That is all going well.  This also gave me a chance to get the aircraft on the gear and things ready to hang the engine one last time.  Here are some misc. pictures...


I don't think I ever showed what the bottom the fuselage looks like.  So, before I removed it from the rotisserie, I took a shot.  The opening on the bottom is where the rear control stick pokes through.


 The gear needs to be on before I mount the engine as the rotisserie attaches to the engine mount lugs.  I don't have the wheels yet - they are due about any time, but that's OK as the fuselage needs to sit lower to mount the engine.

The gear installation took some time, being careful not to scratch anything, plus it needed some tweaking to make everything line up properly.  The axles are still going to need some adjustment once I have it on the wheels and all the weight on them.

The gear uses bungees for shock absorption that are not installed yet.  I'll wait for all the weight to be up front to see how many wraps are required.


Here is an interesting part of originality.  The gear legs were marked "L" and "R" for left and right with a punch.  I thought about filling it in since it is visible, but decided to keep it.  A fun, historical part of the airplane that needed to be kept.


So with it on the gear, I could remove the rotisserie.  In order for my engine crane to lift high enough to set the engine in place, I just have it setting on the axles for now.  I wrapped rope around where the bungees go to hold the gear legs pulled in.


I also needed something on the tail and came up with this.  Maybe this should be my permanent tail wheel!


Here's the mount installed for hopefully the last time.  Previous posts go into detail on making the mount and wood engine bearers.


What's next?  Well, I am going to keep up with the wing and get it completely finished and painted, and install the engine.  By then, I should have the wheels, get the tires mounted and have it rolling around on its gear -   Exciting times!

In the meantime, I hope everyone has a great Thanksgiving!


Thursday, November 10, 2016

Registration Numbers and One Wing Done

Finally...one wing (specifically the upper, right wing) is done!  I know it's been a long time between posts, but I wanted to wait for something significant to write about.  


This particular wing as well as the lower left has the registration number on it.  I'll get into the details of that shortly, but here is an explanation of this particular number and a little history lesson that also applies to other aircraft of this era.


Here is the actual piece of fabric from the rudder showing the number assigned.  

By the way...the original owner, Chuck Balling repainted the aircraft orange and black when he took delivery.  I've painted it in its original colors of silver/red.

So why the "C"?  No, it's not a Canadian aircraft!


Air Commerce Regulations were put into effect late in 1926 for aircraft markings.  All unlicensed aircraft were assigned temporary numbers (no letters at this time) and were to be preceded by "C" for Commercial, "P" for Private, and "S" for State once the number became permanent.  It wasn't until an amendment to this regulation in March of 1927 that required the letter "N" to precede the set of numbers (this was the letter assigned to the U.S.).  Initially it was only for aircraft that were involved in foreign air commerce display, but was later required on all aircraft, domestic or foreign (actual date for this is unclear).  Along with the "N", the aircraft was assigned an airworthiness category letter, "C" for Standard, "X" for Experimental, "R" for Restricted, and "L" for Limited.  Most of us are familiar with this form of marking.  It wasn't until December of 1948 that the airworthiness category letter was dropped, but it is still legal to display it on aircraft this way for historical reasons, like NC1234.

So, going back to the Lincoln-Page...it was assigned a temporary number of 5735 when it was built on May 31, 1928.  When it was sold and the Dept. of Commerce determined its use, it was assigned a permanent number of C-5735 since it was declared it was going to be used for some commercial operations.  All this apparently happened before the amendment that required the letter "N" to precede the number for domestic aircraft.

I have photos showing the same font used on the rudder was used on the wings, although the "C" was never added.  Probably because of the difficulty doing it, and with it displayed on the tail, it met all the requirements.


This is a copy of the application for the original "Airplane License".  It shows the temporary number of 5735 and the permanent number of C-5735 after approval.


Back in the day, these numbers were mostly hand-painted.  The font was not standard as required by FAR part 45 today.  So, that is how I applied these in trying to keep things original.


Here's how it was done:  I took the original piece of fabric from the rudder and scaled it up to 28" for the wing numbers.  28" is a guess, but based on the photos I have, it looks right.


The numbers were then traced on the wing and using a Scotch-Brite pad, I lightly scuffed up the surface for good adhesion.


I hand-painted the numbers on with black butyrate dope that I thinned with retarder.  My thought was the retarder would allow the dope to melt into the silver so I would never have to worry about adhesion.  Seemed to work good.

I love the look of it.  Much more interesting than standard block letters!


While I was doing all the spraying and laying out of numbers, I got the upper left wing mostly covered.  It's just about ready to go into the booth for spraying.


Not completely sure yet, but I may take a break from covering on the lower wings.  The spoked wheels I'm getting made are just about done, so I would like to get the airplane on the gear, hang the engine and start installing other misc. things.  So don't touch that dial, not sure what the next post will cover.


Saturday, October 8, 2016

Covering and Other Misc. Update

Finally...we had low enough humidity here in NC Illinois to finish spraying the tail surfaces.  Everything is silver from now on (no trim) so the spraying is easy since it is going over the silver Rand-O-Fill.


Here are some pics.  Sorry, they are not very detailed.  I immediately hung them from the ceiling since I will not be ready to install them for a while and didn't want them to get any damage. Still need to add the registration number to the rudder and Lincoln-Page logo on the vertical fin.  Those will be hand-painted on.


Upper right wing being covered


While I was waiting on the low humidity, I got a good start on the upper right wing.  Had to build a rotisserie.  It attaches to the wing attach fittings on the root end, and during the covering the tip end is just held up with a saw horse.  When I start spraying, I will come up with some sort of tripod to attach to the strut fittings to allow the wing to stand vertical from the leading edge.


As I mentioned in other posts, I prefer the "old school" way of rib lacing:  round cord with the runner and knot on the outside of the fabric.  I put the knot/runner on the bottom of all horizontal surfaces and on the right side of vertical surfaces.


I also started to fit up the cockpit sheet metal.  Some of this is original, some the previous owner had made by United Airlines mechanics back in the 1960's.  Some of it is good, the workmanship on other pieces is questionable.  That's why I wanted to get it installed - to see what is usable and what is not.

The front cockpit has controls - stick, throttle and rudder pedals but no instruments.  Typical of many biplanes from this era.


Mostly a lot of wing covering for the next couple months.  There is always lots of other stuff as fill-in while I'm waiting on dope to dry, etc.  Stay tuned - not exactly sure what the next post will cover.  Hope to also get out and enjoy some of the beautiful fall weather!